
Full Bathroom Renovation on a Small Budget, with a Unique 70’s Vibe
As explained in the last post, I have recently been spending some of my creative energy and talent on renovating my new apartment in western Sydney.
I definitely wanted to add my creative flare and love of colour and print… but I had to keep to a very tight budget! So I decided to reuse as much of the original bathroom as possible- and I couldn’t be happier with the results!
This is the blank canvas I had to work with… rather boring and bland in colour and no personality.
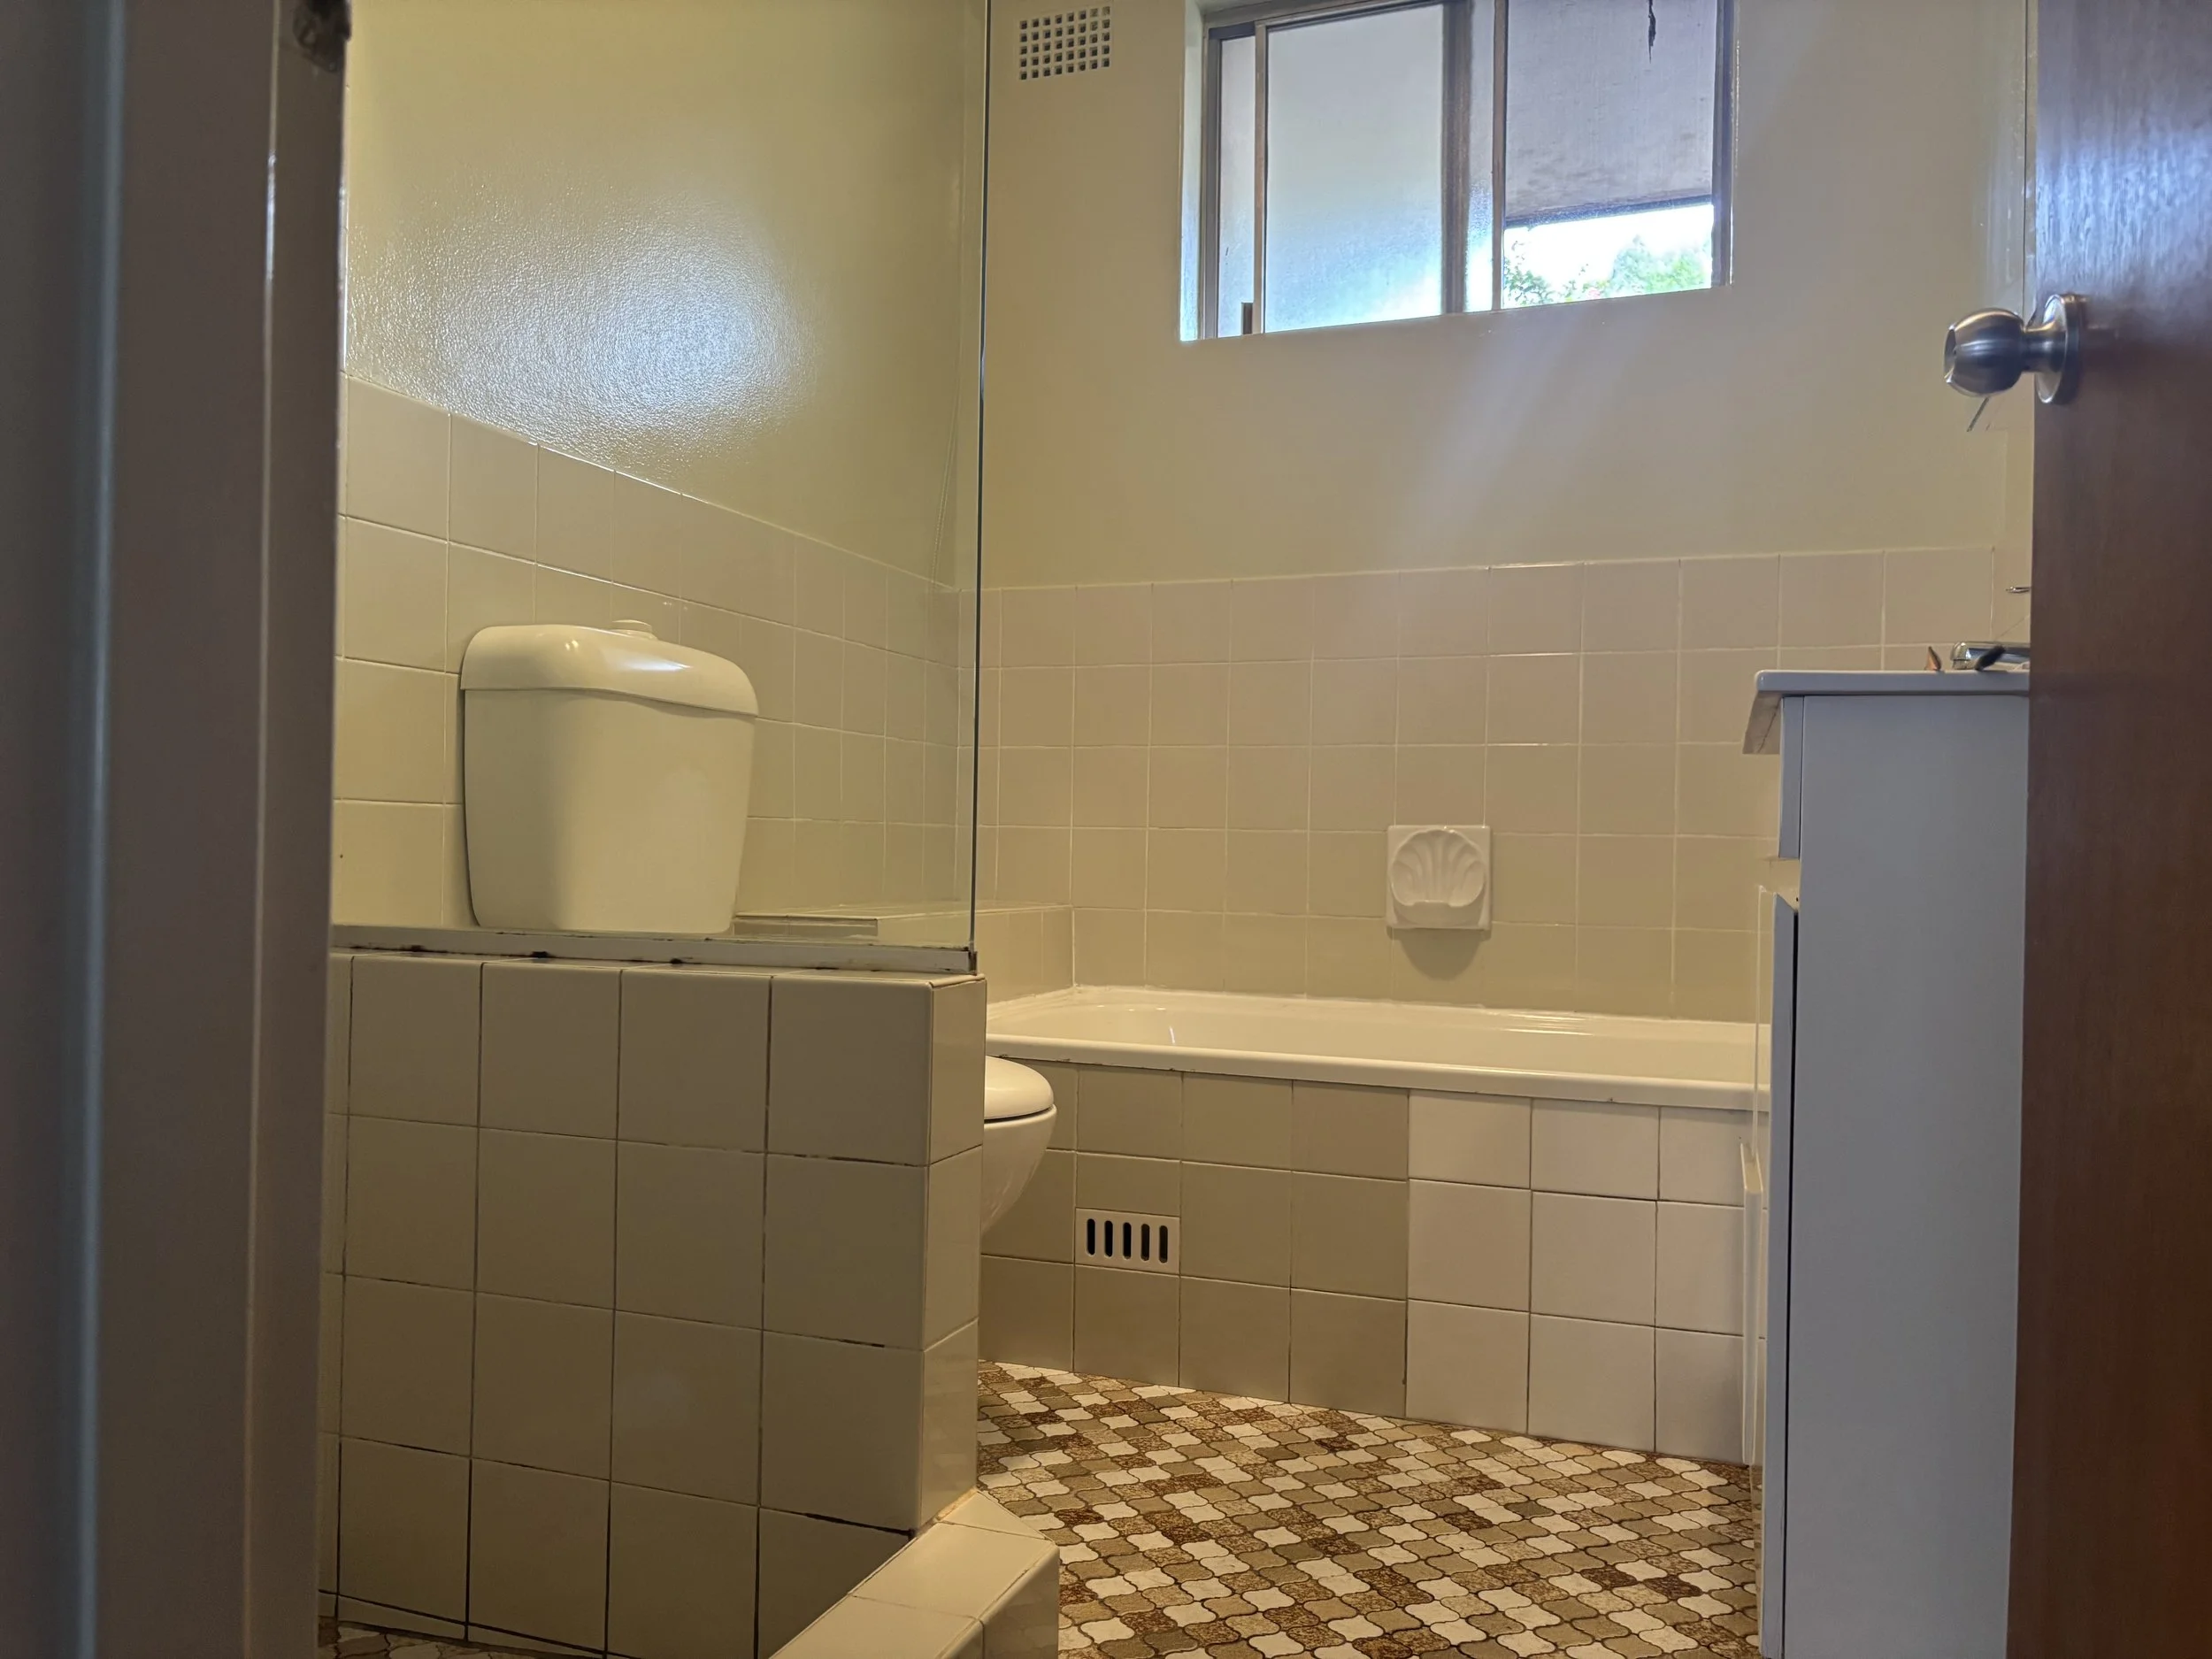
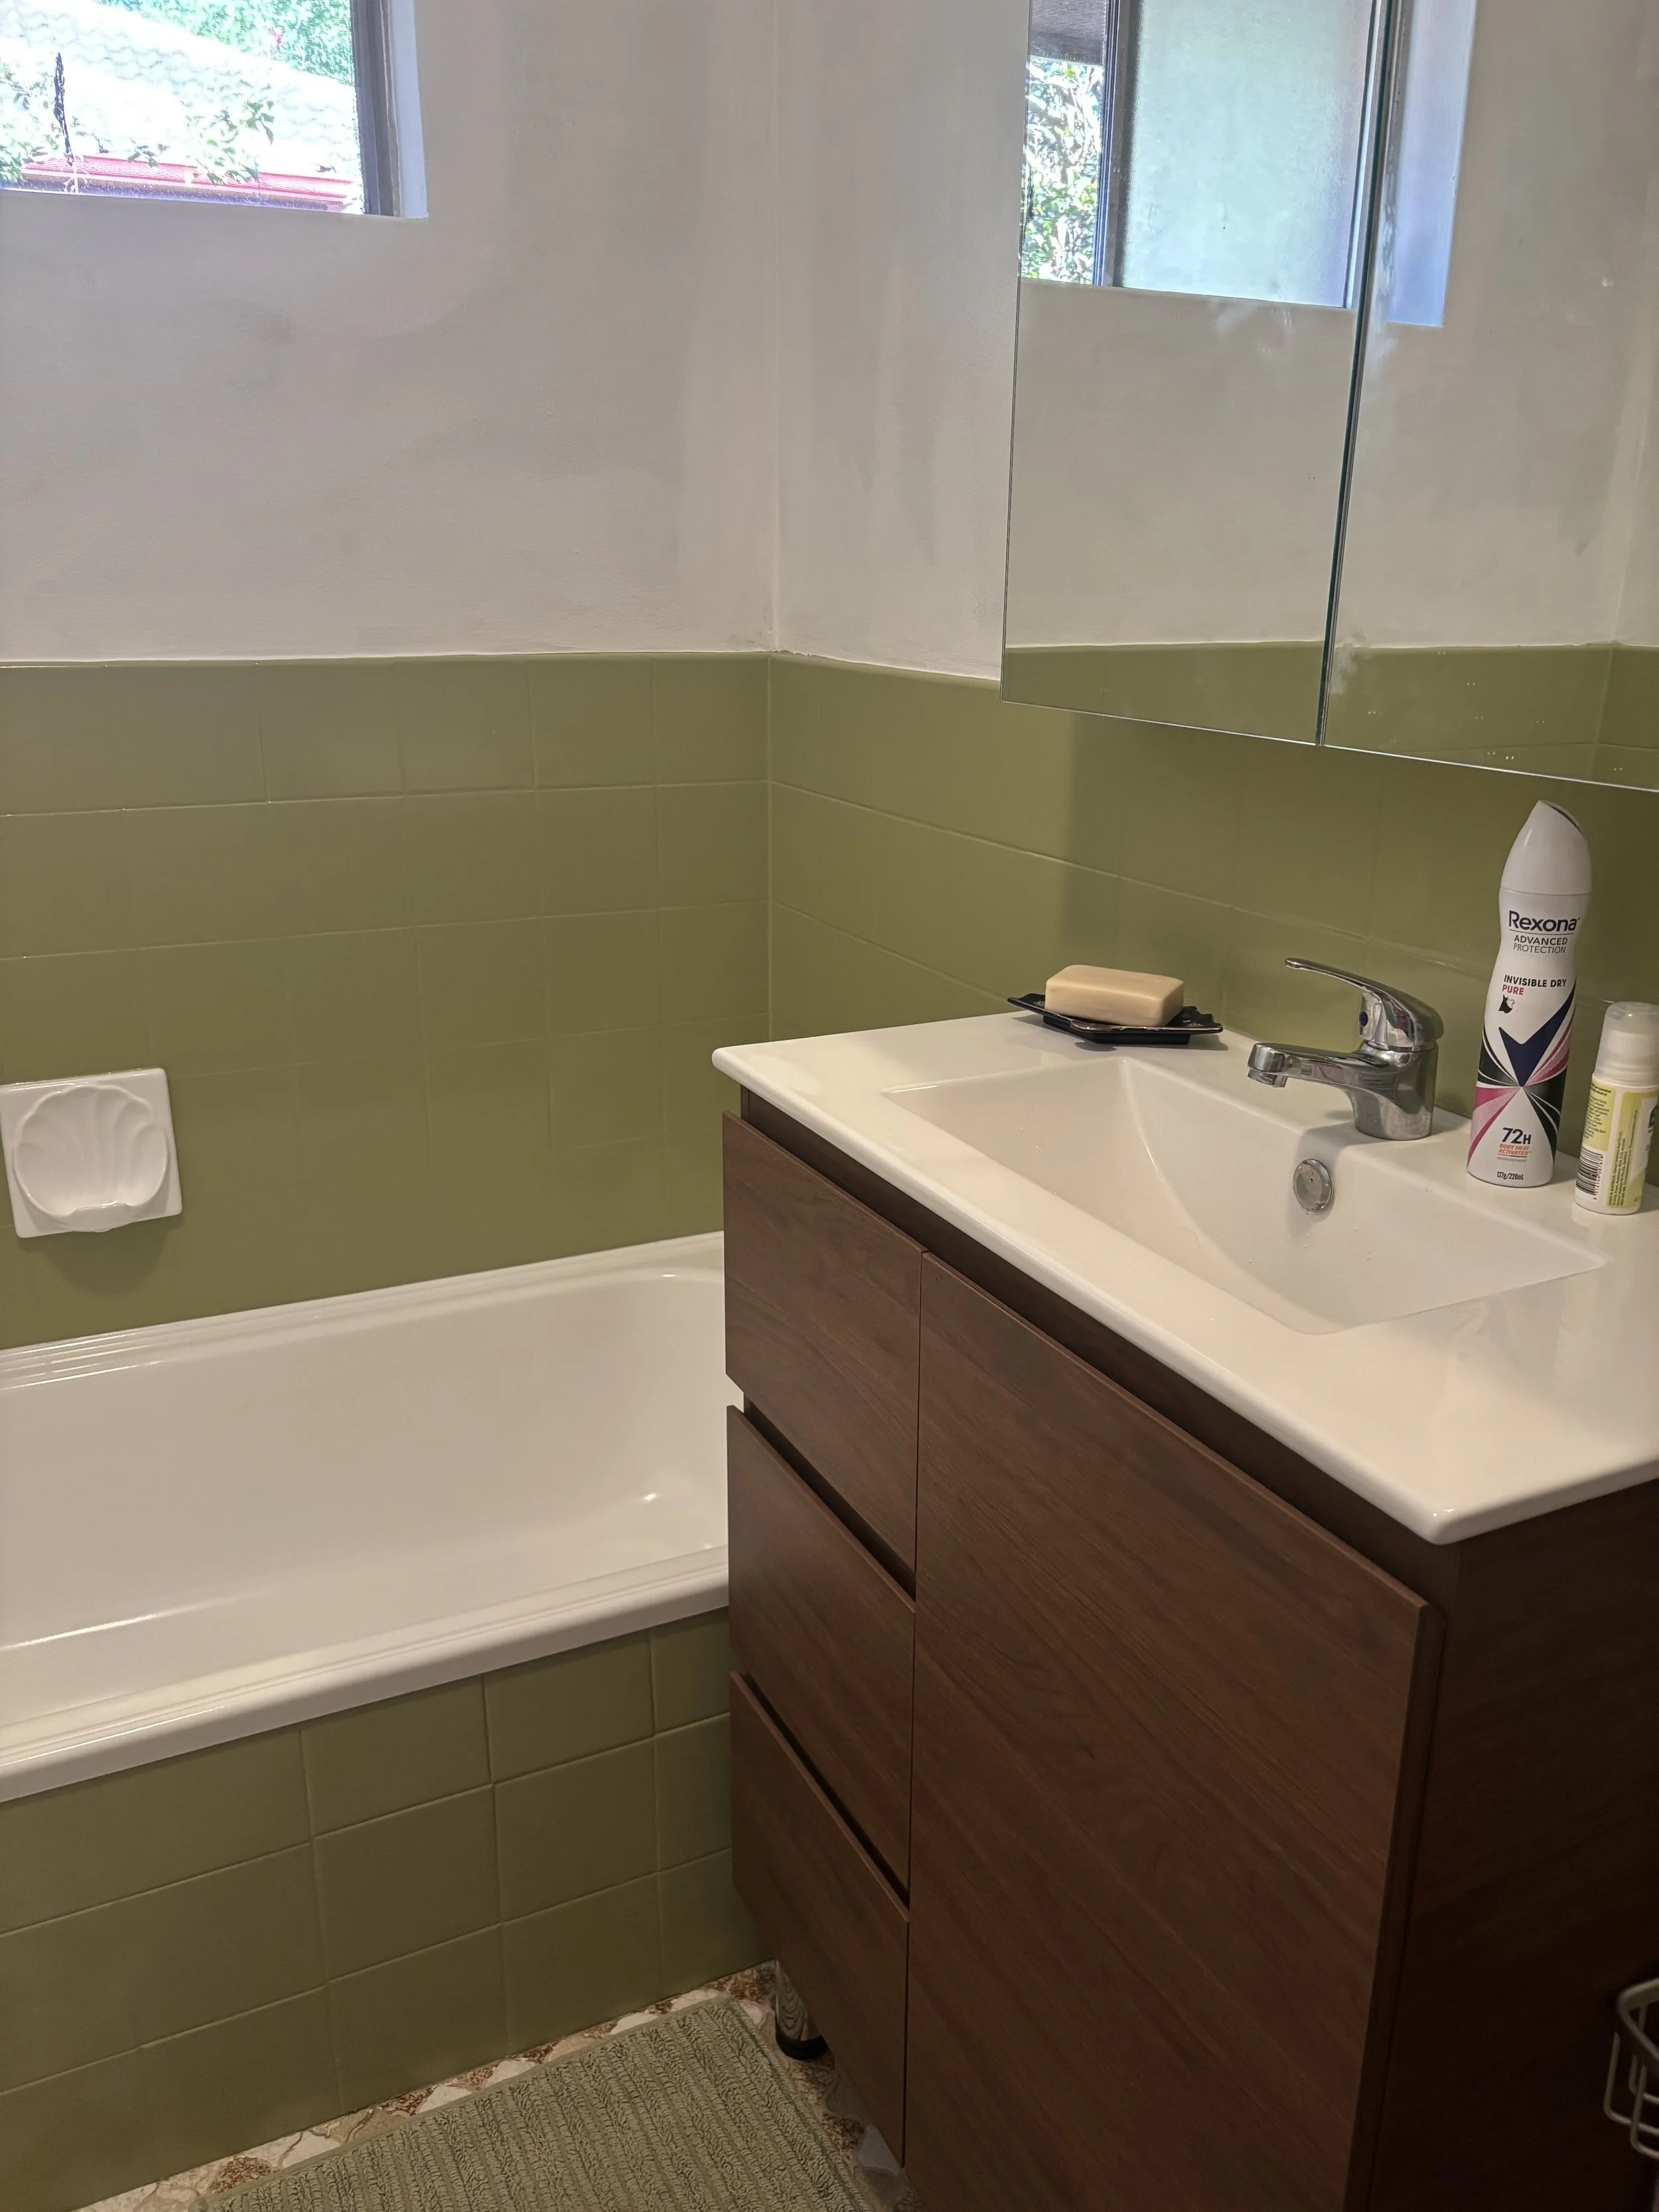
As you can see, the original bathroom had tiles replaced, so there were two colours… ewww! Then the green tile colour was so muted that it actually looked like a beige cream in the light. The vanity unit simply had to go! And also the taps and toilet seat and cistern had to go.
And then… this is the result with a little creativity and help from some great tradies!
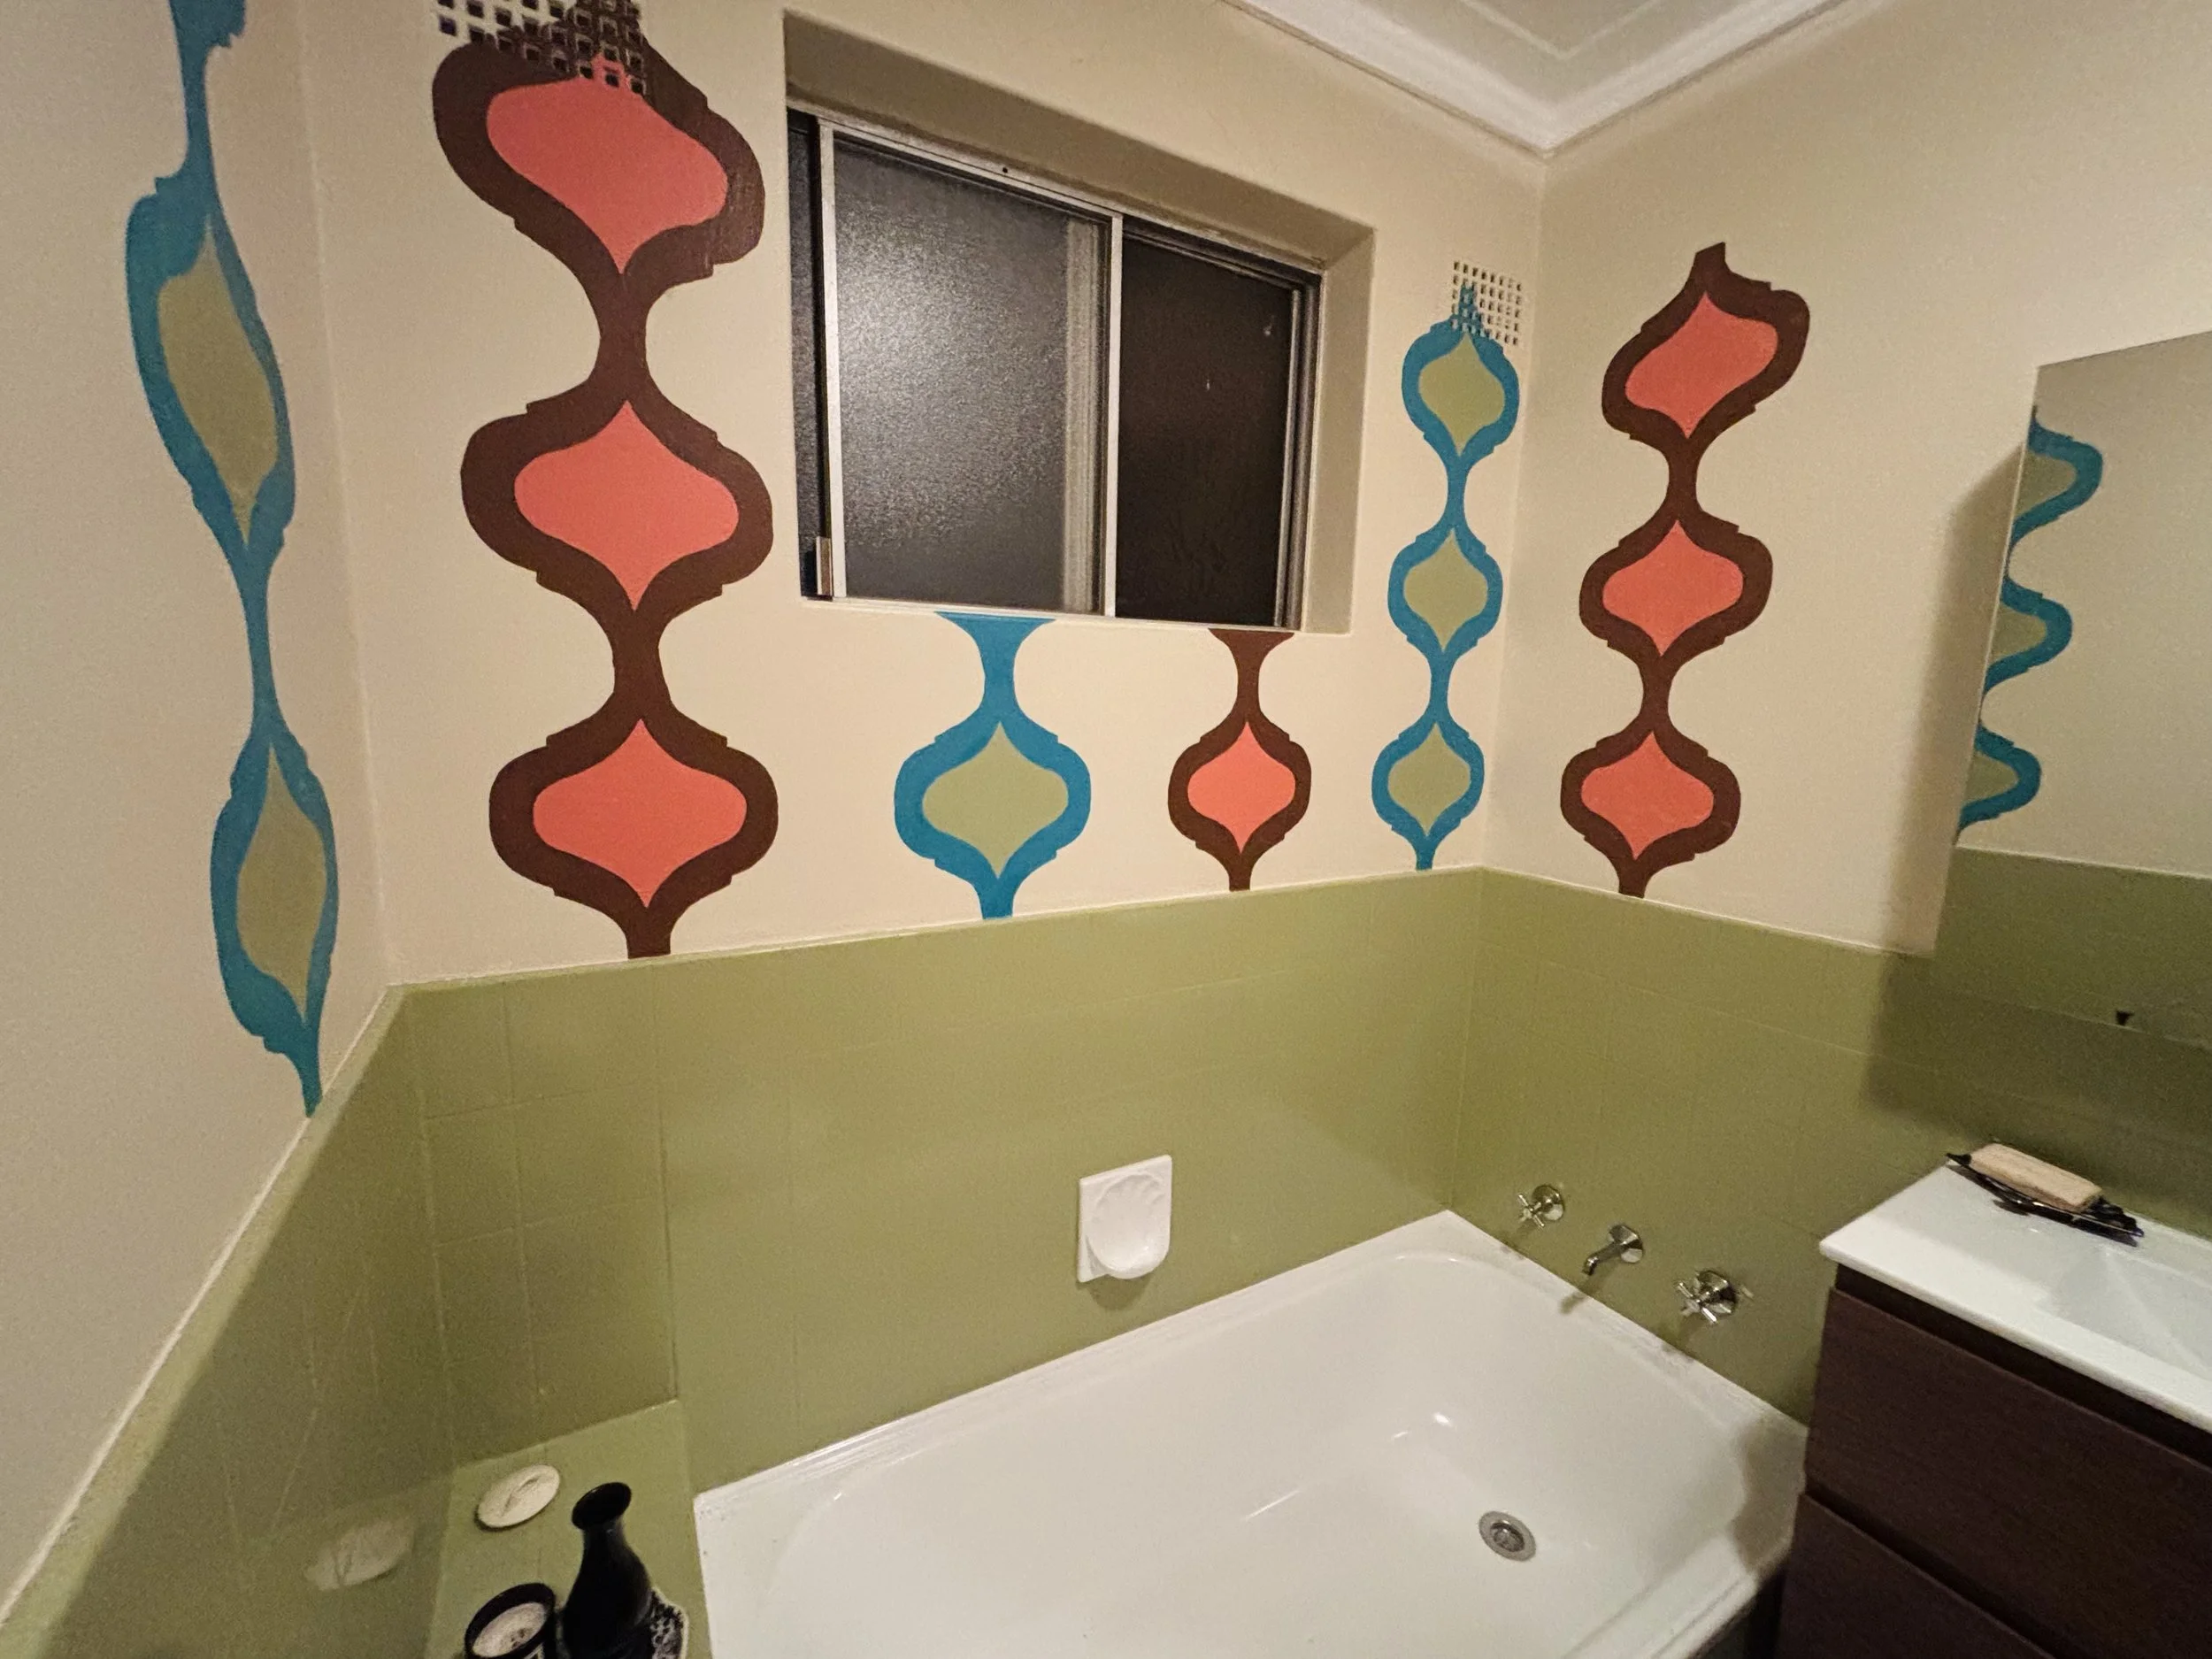
I couldn’t be more thrilled with the results!!!
I was inspired by the tiles on the floor. They are the original 70s tiles installed when the building was brand new, I would say, and I wanted to make this a feature, rather than try to ignore them. I love 70s patterns anyway! They prominently feature in my handmade fashion! So it was very fitting for me to bring them out as a feature in my bathroom! So the pattern, that I painted on the wall as a mural, is just an enlarged version of the floor tiles!
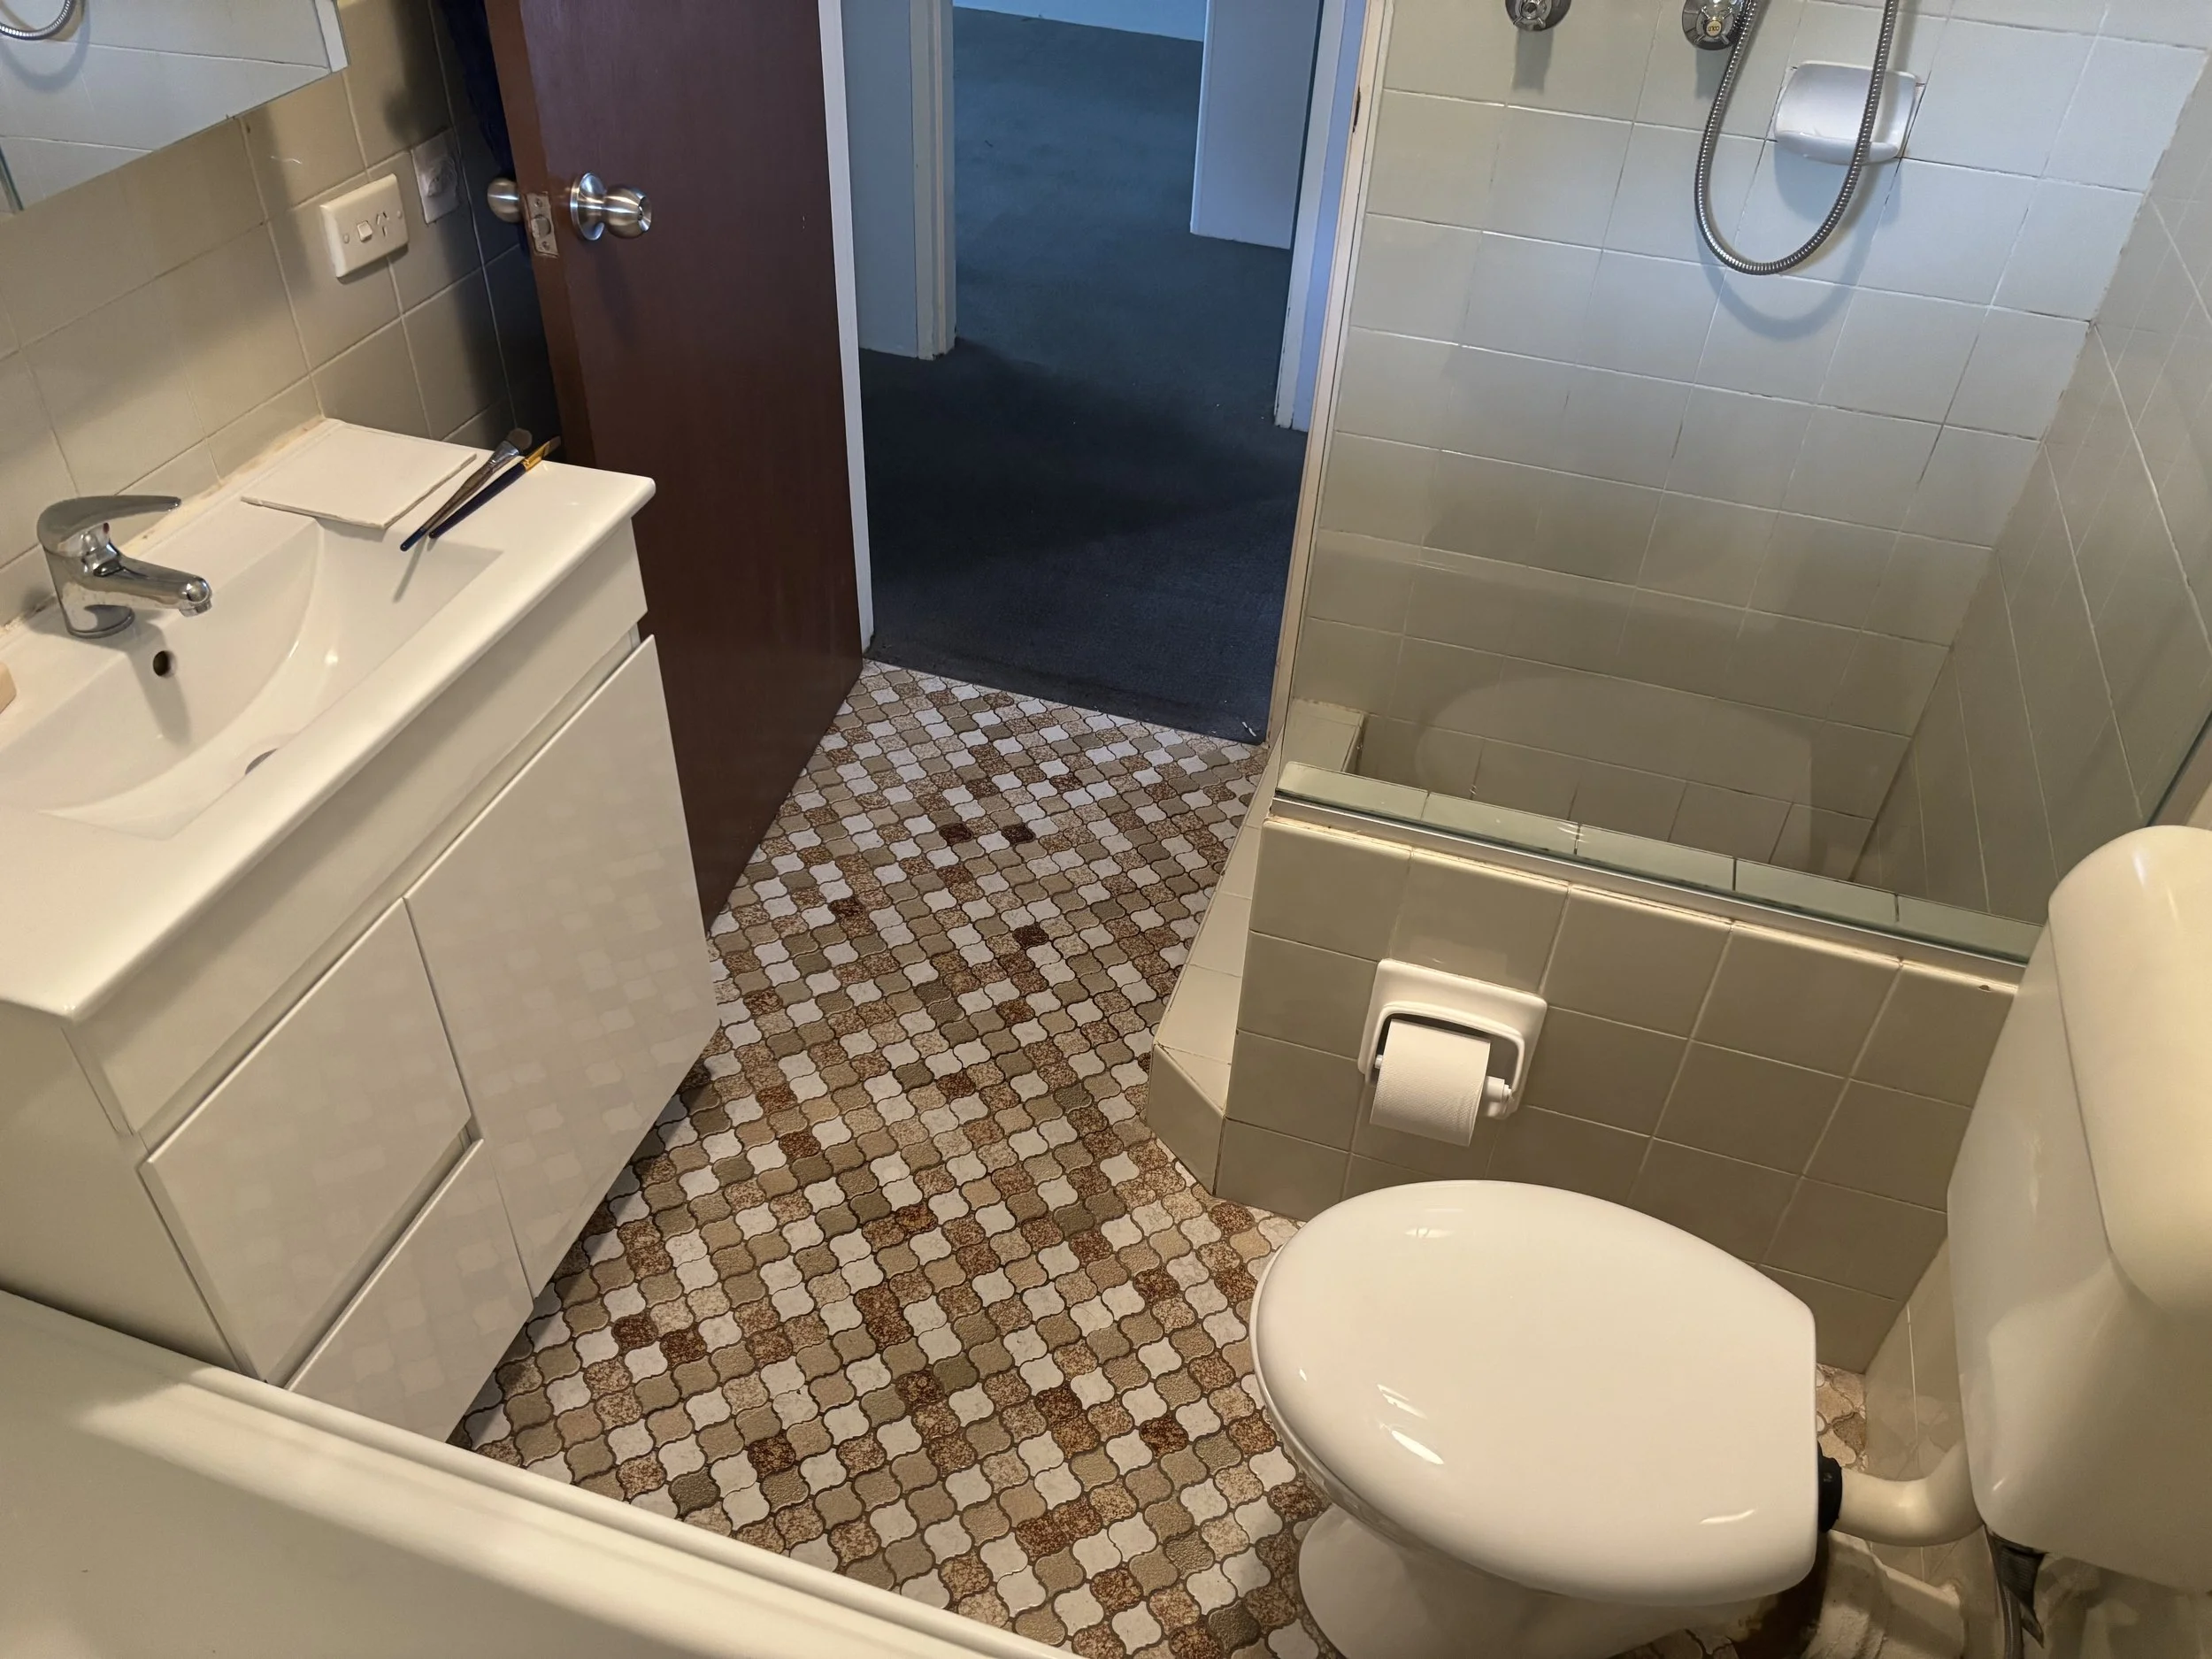
I decided to bring out the green featured in the floor tiles, and make it brighter and much more of a fun colour, and rather than replacing the tiles, which would’ve been extremely expensive, and time consuming and a major renovation… I decided to get them resurfaced! It’s so easy and I highly recommend it! I couldn’t be happier with the results! I feel like I have a brand new bathroom for a fraction of the cost!
Jason from Thermoglaze was very helpful, prompt and reliable, and I would highly recommend him and his services. He resurfaced every tile and all bath and soap dish surfaces.
While it cost me more to get both a white enamel on the bath and soap dishes and toilet roll holder, and then also get the green done too (most people only ever get everything resurfaced white these days), it was absolutely worth it, and the green has created this unique, lovely space and backdrop for the rest to shine!
My plumber was fantastic too. A local tradesman to the area, who was very prompt, gave me a fair price and did the work on time. He also worked with my requirements and special requests which was really great. I highly recommend Tom from Seamless Plumbing Solutions!
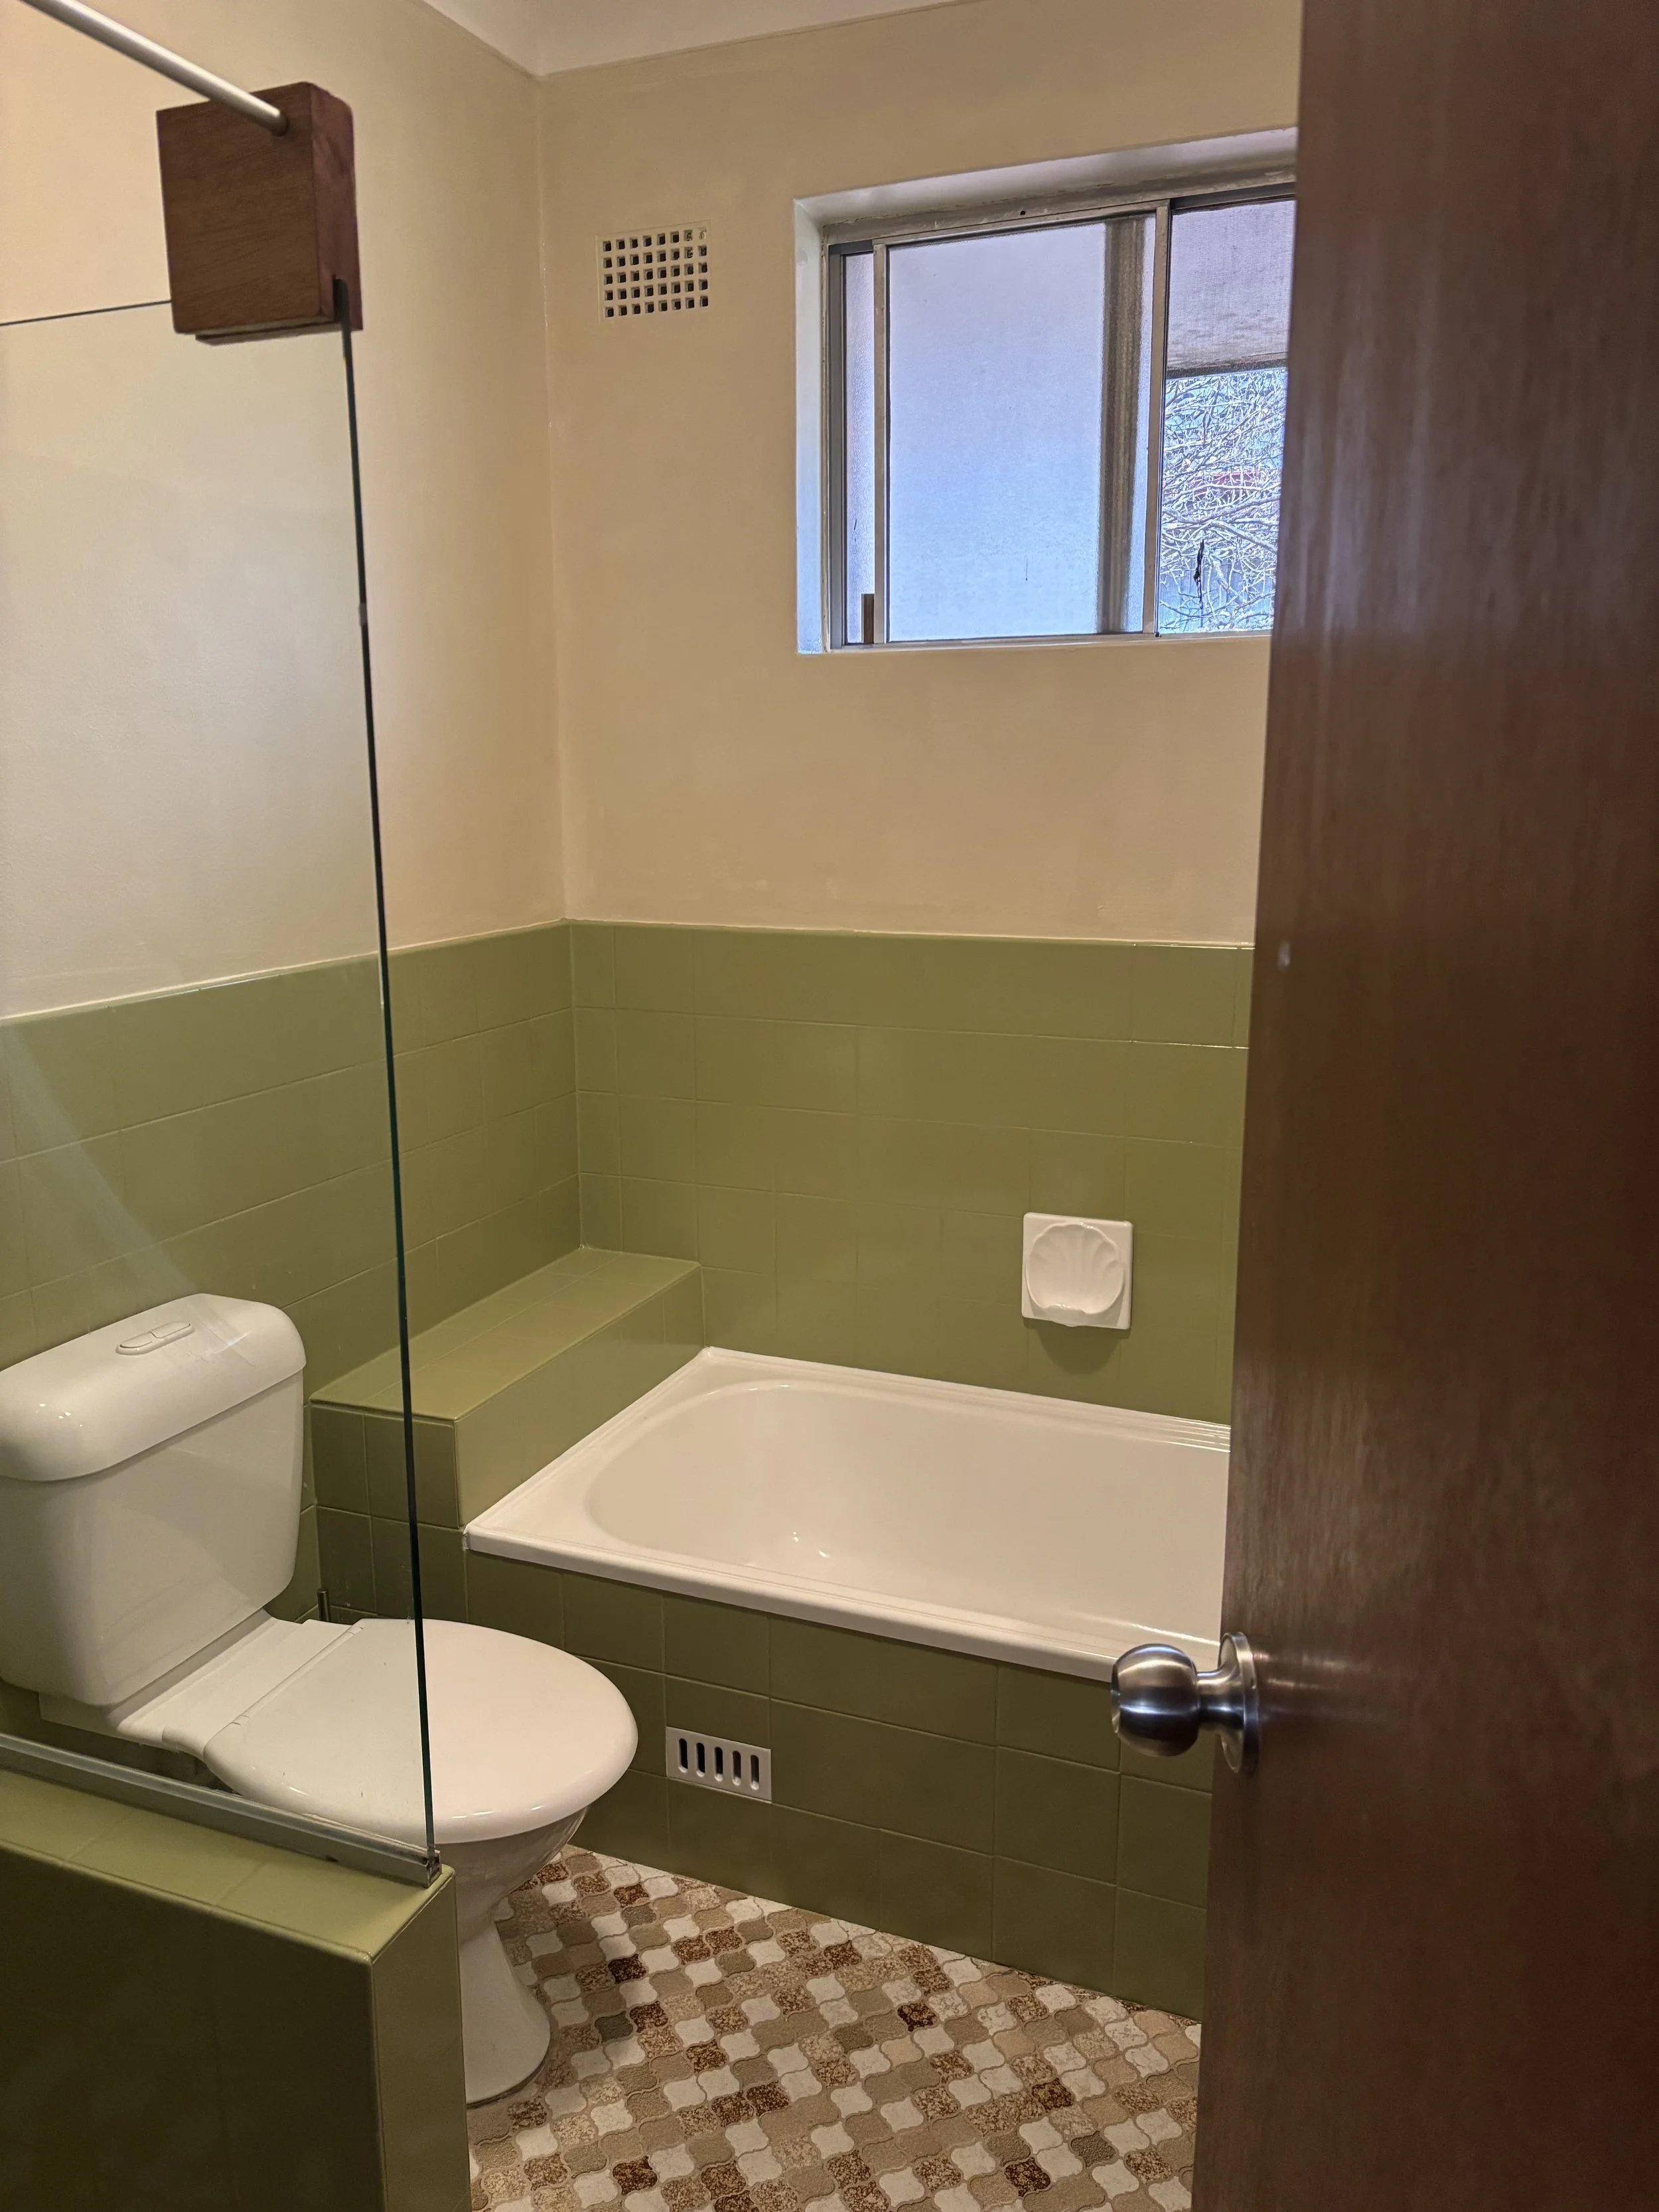
This pic above is before I painted the mural… I definitely need to get more finished mural pics.
The pic below is before I even painted the walls the cream colour… however you can see my lovely vanity unit. I chose the chocolate brown colour because the floor tiles also feature chocolate brown too.
Here are a few pics of me creating the mural…
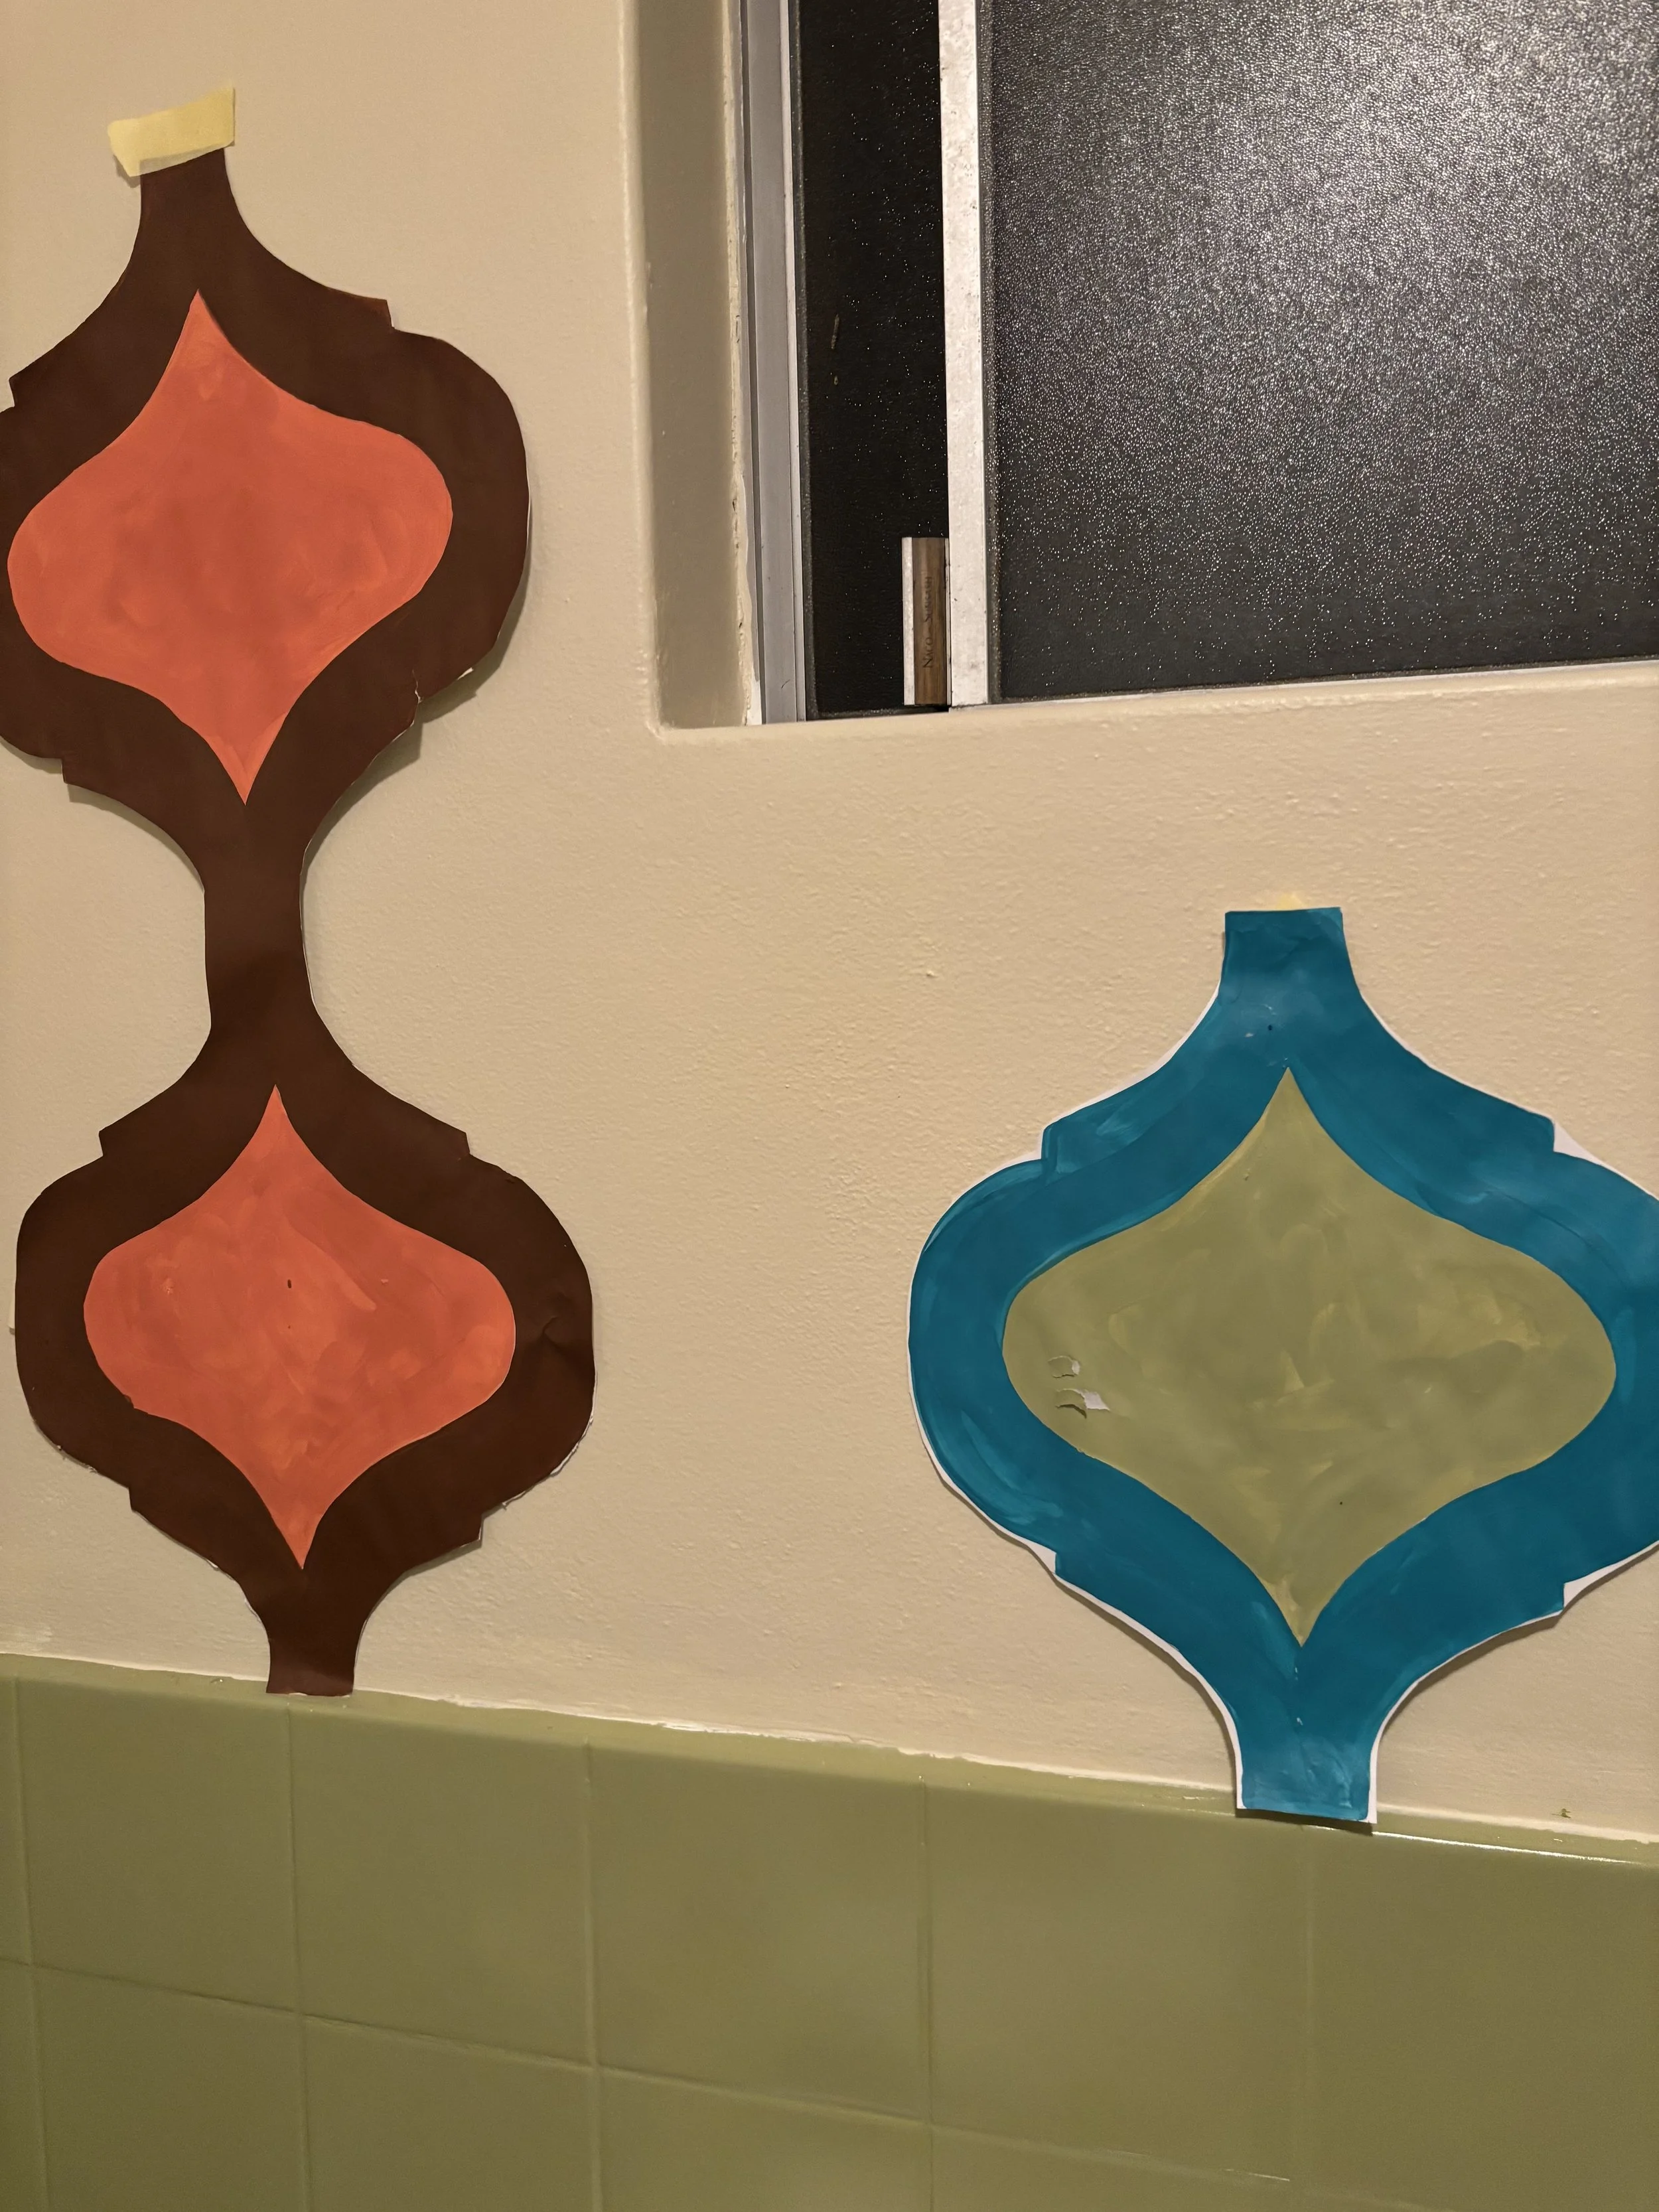
First I created a mock up on paper to see if I really liked it or not.
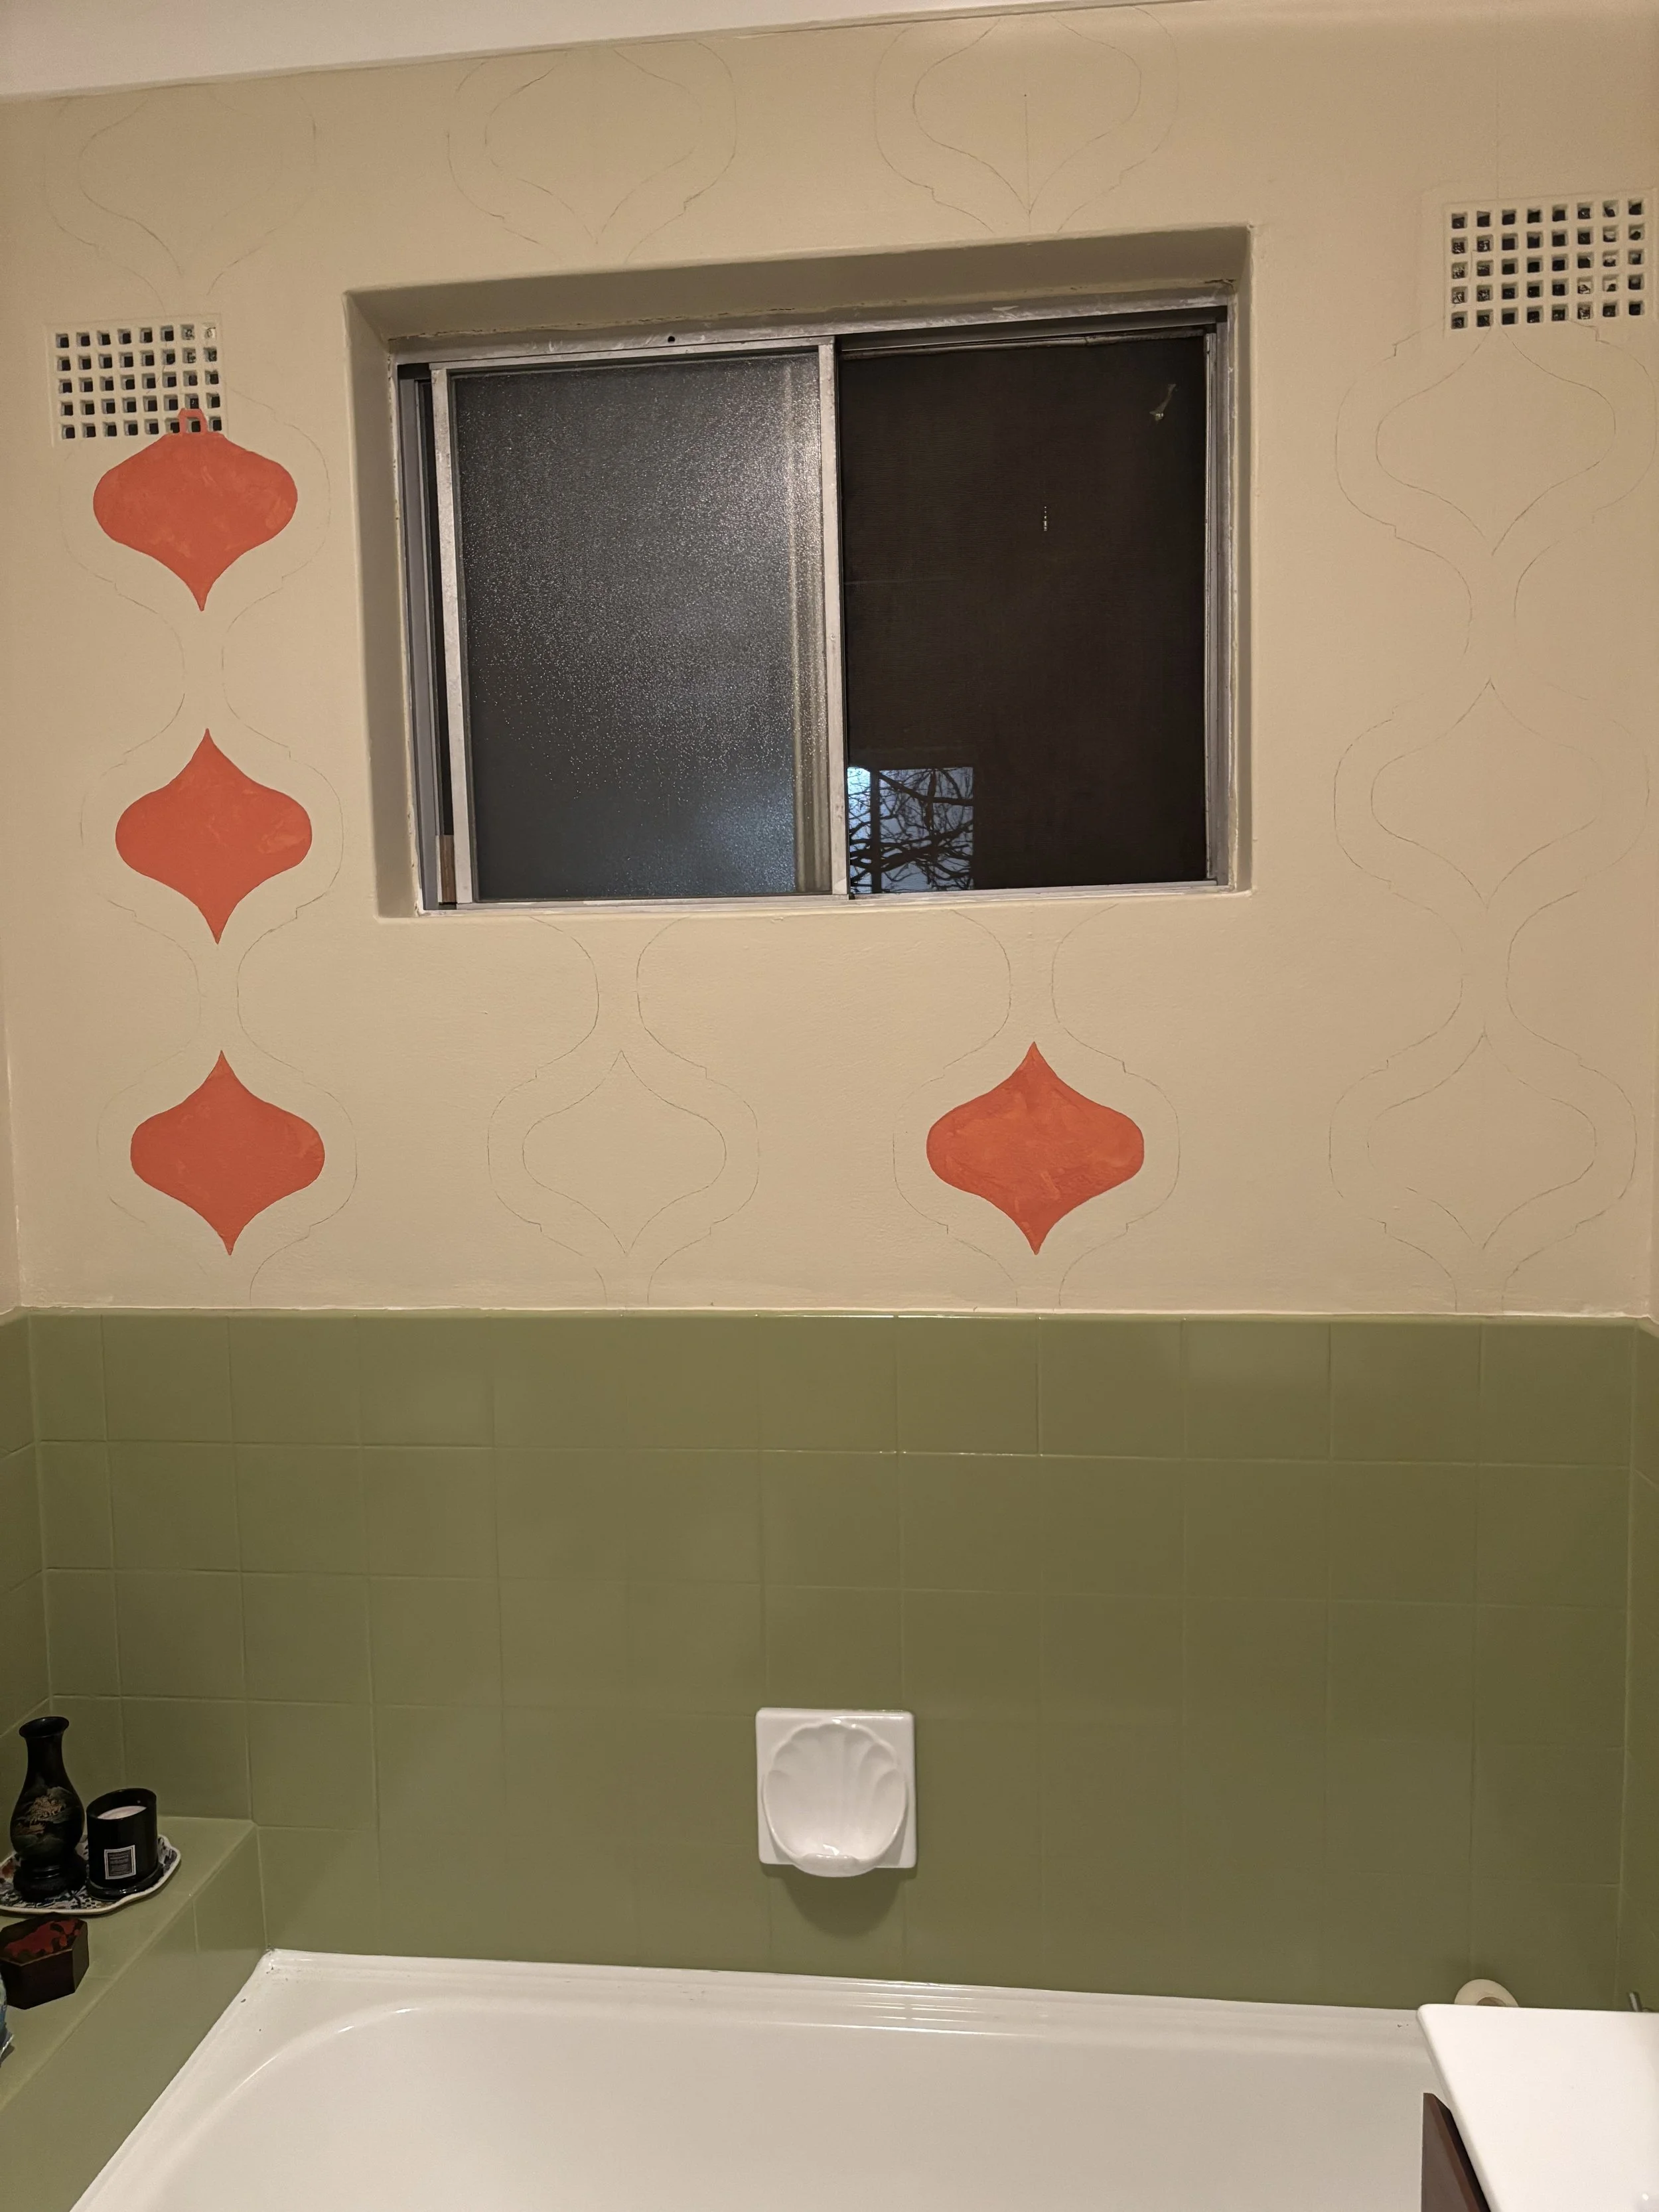
I outlined the motifs in pencil on the wall using a template I created… and then I started to paint!
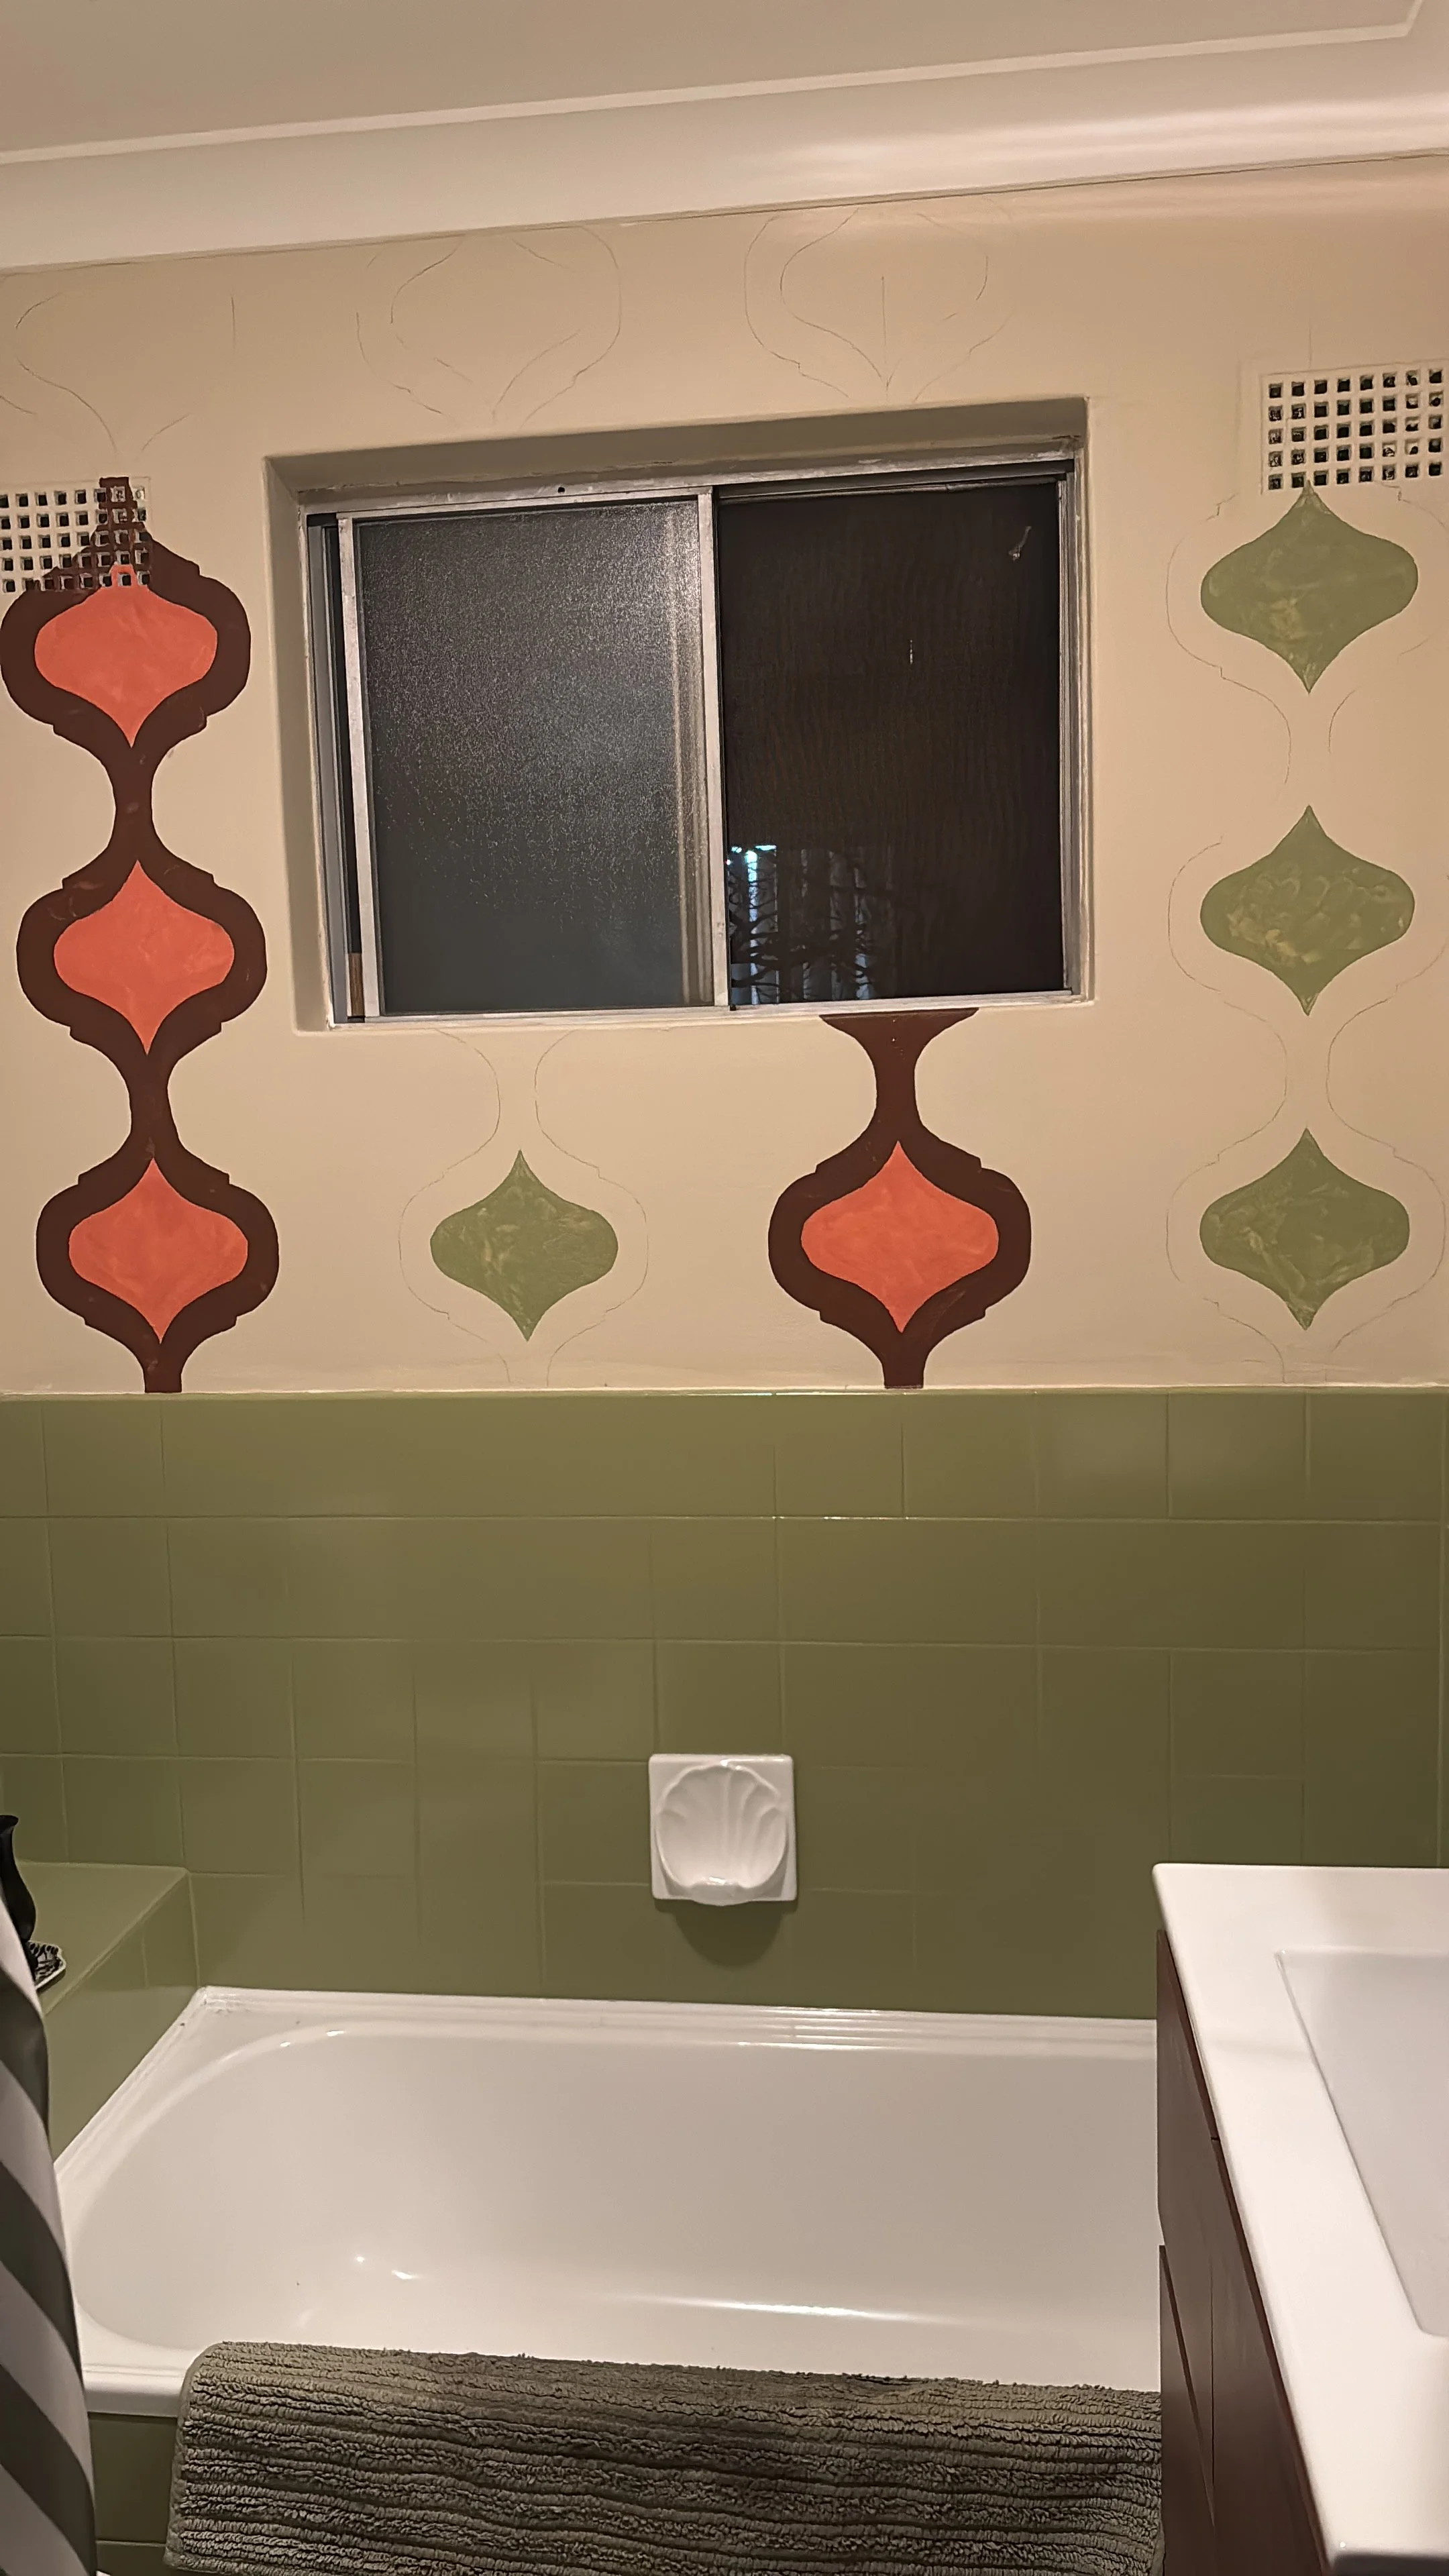
I painted at least two coats of each colour. Some I had to paint three times.
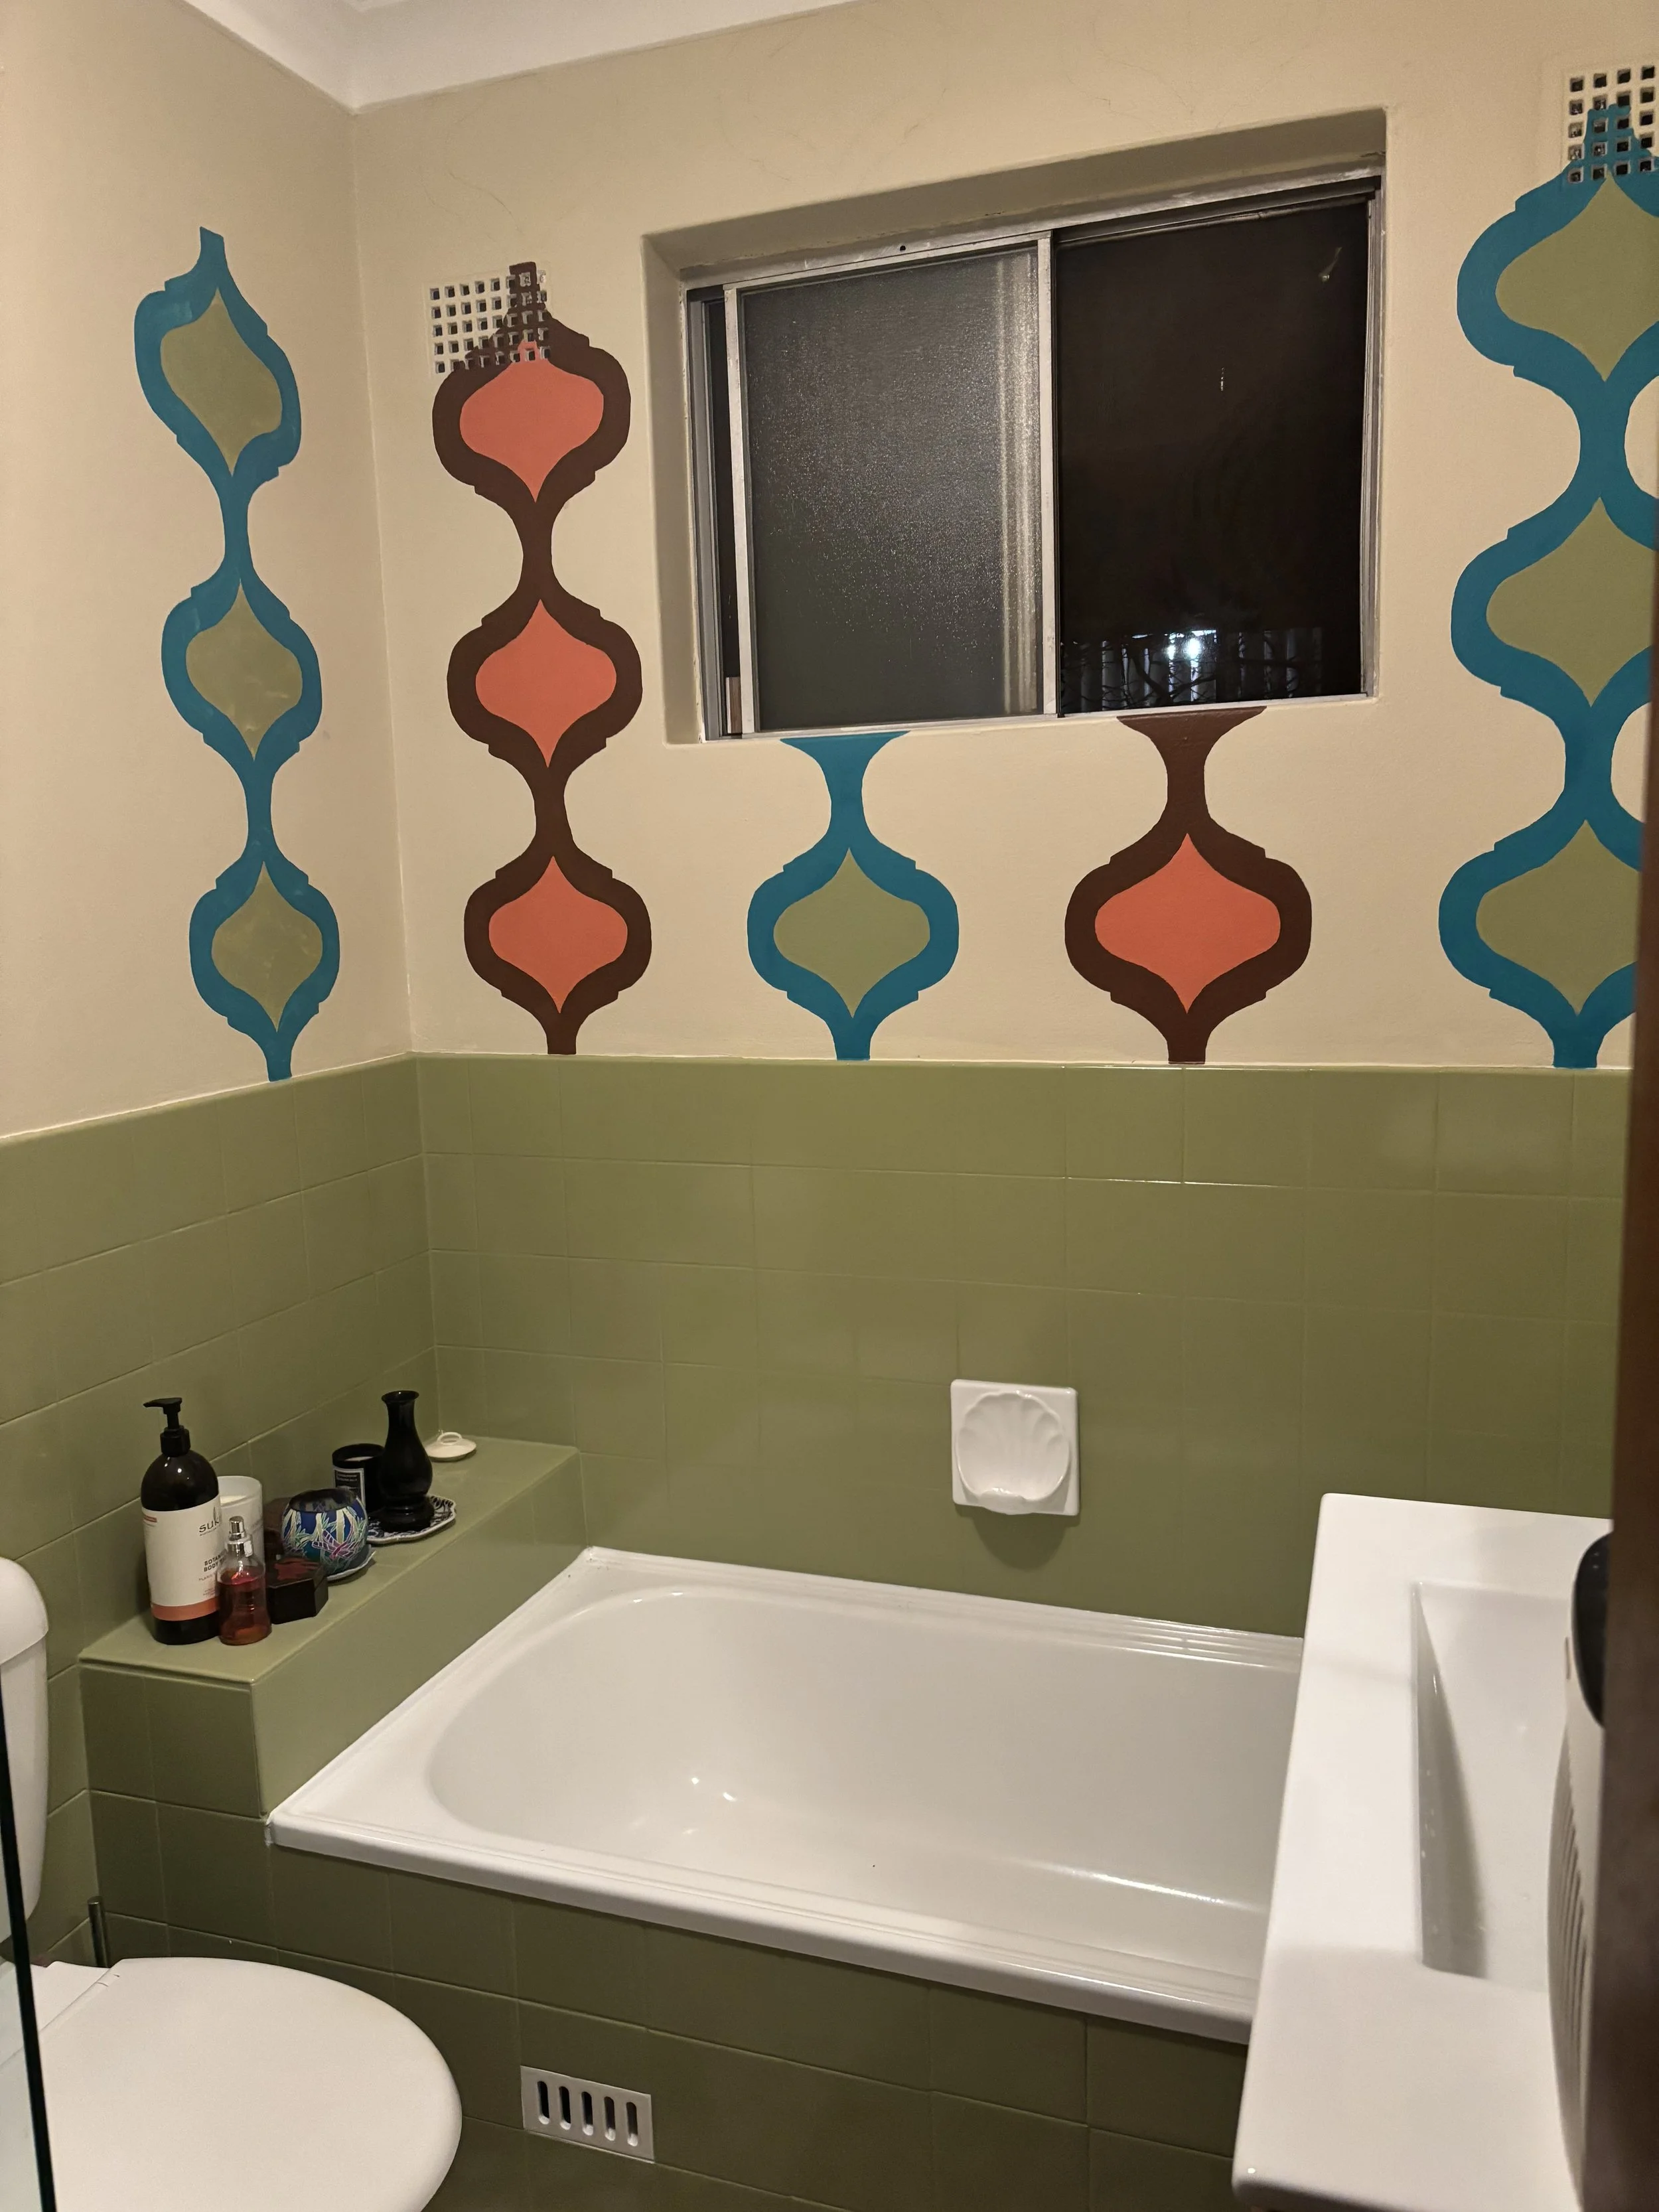
You may have noticed that I decided not to go all the way up to the ceiling or all the way around the walls. I decided this because that is the beauty of a mural, rather than wall paper- you can stop and start the mural wherever you please! If I had used wall paper I would’ve had no choice but to cover the whole wall.
I am really happy with my beautiful 70’s inspired bathroom! It has a brilliant retro feel to it, while also still remaining very modern and functional. I still need to paint my bathroom door and change the light fitting, but otherwise I am very very pleased!